Taxi Icons: Elevating Your Web Design with Precision
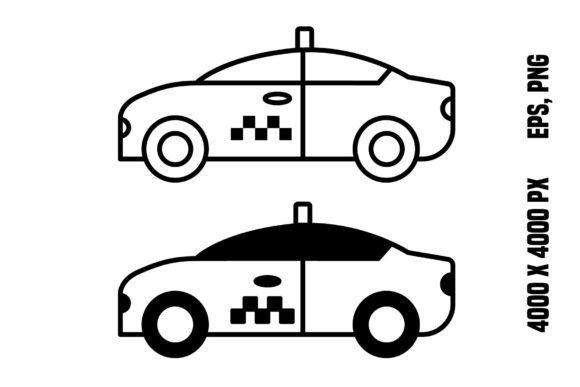
When you are building a website for a ride-sharing startup, a local transport service, or even a travel blog, the smallest visual elements often carry the heaviest load. A Taxi Icon is not just a picture of a car; it is a functional signal that tells your user immediately where they can find information about transportation. Welcome to the store Travel vector icons for web design, where we focus on providing assets that work as hard as you do. This specific collection includes a ZIP file containing two distinct vector design elements available in transparent image formats like EPS and PNG. These files boast a high resolution of 300 dpi and dimensions of 4000 x 4000 pixels, ensuring they look crisp on everything from a mobile screen to a billboard.
The Hidden Cost of Low-Quality Graphics
Many designers and business owners overlook the technical specifications of their graphics until it is too late. You might be tempted to grab a quick, low-resolution clipart image because it is free or instantly available. However, this decision often leads to a pixelated, unprofessional appearance that undermines your brand's credibility. When an icon lacks sufficient resolution, it becomes blurry when scaled up or viewed on high-density displays like Retina screens. This blurriness creates a subtle but persistent friction for the user, making the interface feel cheap or outdated.
Consider the difference between a standard 72 dpi image and the 300 dpi quality found in our Taxi Icons package. The higher resolution ensures that lines remain sharp and edges stay clean, regardless of how much you zoom in or out. For professionals, entrepreneurs, and freelancers, maintaining visual integrity is non-negotiable. A blurry icon suggests a lack of attention to detail, which can make visitors question the reliability of the services you offer. By choosing high-resolution vectors, you avoid the costly mistake of having to redesign your entire navigation bar or hero section later because the original assets could not scale effectively.
Understanding Vector Formats: EPS vs. PNG
A common misunderstanding in the design community is treating all image files as interchangeable. It is crucial to understand the distinction between the formats provided in this package: EPS and PNG. Each serves a unique purpose, and using them incorrectly can hinder your workflow and final output.
EPS (Encapsulated PostScript) files are vector-based. This means they are made of mathematical paths rather than a grid of pixels. You can resize an EPS file to any dimension without losing quality. This format is ideal if you plan to use the icon in print materials, such as brochures, business cards, or large banners. If you are working with professional design software like Adobe Illustrator or InDesign, the EPS file allows you to edit colors, adjust line weights, and integrate the icon seamlessly into complex layouts.
PNG (Portable Network Graphics), on the other hand, is a raster format optimized for web use. The key advantage of PNG over JPEG is its support for transparency. When you place a taxi icon on a colorful background, a PNG ensures that only the icon itself is visible, without an awkward white box surrounding it. Our package provides these in a high resolution of 4000 x 4000 pixels, which is significantly larger than the typical requirement for web use. This oversizing is intentional; it allows you to crop, mask, or downscale the image for various devices while retaining perfect clarity.
Mistakes happen when users try to use a PNG for large-scale printing, resulting in jagged edges, or when they attempt to edit an EPS file in software that does not support vectors. Always match the file type to your medium. For web design, start with the PNG for immediate implementation. For branding packages or print collateral, utilize the EPS file to maintain maximum flexibility.
Common Pitfalls in Icon Selection
Even with high-quality files, poor selection strategies can ruin a design project. One frequent error is inconsistency. If your Taxi Icons feature a bold, thick stroke style while the rest of your site uses thin, delicate lines, the visual hierarchy breaks. Users may struggle to distinguish the icon from decorative elements. Before downloading or buying, evaluate how the icon fits into your existing design system. Does the color palette align? Is the level of detail appropriate for the size at which it will appear?
Another overlooked detail is the context of usage. An icon that looks great on a desktop monitor might become indistinguishable on a smartphone screen if it contains too much intricate detail. While our 4000 x 4000 pixel images are incredibly detailed, you must ensure that the design remains legible when scaled down to 32x32 pixels for a mobile app menu. Test your icons at actual sizes before finalizing your layout. If the taxi shape becomes a blob of color on a small screen, consider simplifying the design or increasing the contrast.
Practical Steps for Better Results
To get the most out of this resource, follow a structured approach to integration. First, extract the ZIP file carefully to ensure both the vector and raster versions are accessible. Do not delete either file type unless you have confirmed you will never need the alternative format. Second, check the transparency of the PNG files against your specific background colors. Even with a transparent background, some compression artifacts can appear around the edges of complex shapes. Inspect the icon at 100% zoom to ensure the edges are smooth.
For those who are beginners or hobbyists, remember that simplicity often wins. You do not need to customize every aspect of the icon. Sometimes, the best choice is to use the asset exactly as provided, trusting that the professional design has already solved the problems of balance and proportion. However, if you are a professional designer, take advantage of the EPS file to tweak the color to match your brand guidelines precisely. This customization ensures that the Taxi Icons feel native to your brand rather than pasted on top of it.
Finally, consider the broader ecosystem of your project. Are there other icons needed for buses, trains, or airplanes? Consistency across a set of travel vector icons is vital. Using a single high-quality taxi icon alongside a mismatched set of other transportation symbols can dilute the overall impact. Ensure that whatever additional assets you source share the same stylistic DNA—same line weight, same curvature, and same level of abstraction.
Verifying Your Assets Before Launch
Before you publish your website or print your marketing materials, perform a final quality check. Open the PNG file in a browser window and view it on different devices. Check how it renders on a tablet versus a phone. Look for any aliasing or fuzziness. Then, open the EPS file in your vector editor and verify that the layers are organized correctly and that no stray anchor points exist outside the main shape. These small checks prevent embarrassing glitches after launch.
Thank you for visiting the store and exploring these resources. By prioritizing high resolution, understanding file formats, and applying thoughtful design principles, you ensure that your digital presence communicates professionalism and trust. Whether you are a marketer looking to boost engagement or a developer building a robust application, the right tools make all the difference. Let these Taxi Icons serve as a reliable foundation for your next great project.